What this does
This PowerShell command shows how to check disk space on your Windows drives. It is a fast way to identify low-storage issues without clicking through File Explorer.
When you’d use this
- Windows displays low disk space warnings
- A PC is slow and storage may be full
- Before installing updates or large applications
- As part of a quick system health check
PowerShell command (copy and paste)
Get-PSDrive -PSProvider FileSystem
What the output means
- Name – the drive letter
- Used – space already used
- Free – available space remaining
This instantly shows which drive is causing the problem.
Common mistakes to avoid
- Only checking the C: drive and ignoring others
- Forgetting cloud sync folders (such as OneDrive) still use local disk space
- Assuming “Documents” is small while hidden folders are large
Efficiency tip (show results in GB)
Get-PSDrive -PSProvider FileSystem |
Select-Object Name,
@{Name="Used (GB)";Expression={[math]::Round($_.Used / 1GB, 2)}},
@{Name="Free (GB)";Expression={[math]::Round($_.Free / 1GB, 2)}}
This format is easier to understand and ideal for:
- Support tickets
- User explanations
- Quick reports
Why this improves efficiency
- Faster than browsing multiple drives
- Shows all disks in one view
- Perfect for remote troubleshooting
- Safe to run without administrator access
Related PowerShell efficiency posts
- PowerShell Efficiency: The Fast Way to Manage Windows
- Check when a Windows PC was last restarted
- Find the biggest files on your PC using PowerShell
Related Posts
- PowerShell – The Fast Way to Manage Windows
- Find the Biggest Files on Your PC Using PowerShell
- Check When a Windows PC Was Last Restarted
- Find and Close a Stuck Application Using PowerShell
- Pull Recent System Errors Using PowerShell
- Test if a Network Port Is Open Using PowerShell
Automate disk space monitoring with Task Scheduler
Rather than manually running the command each time, set up Windows Task Scheduler to check disk space automatically and alert you before storage becomes critical. This is essential for servers, managed machines, and systems you monitor regularly. Automated checks catch problems before users report them and avoid the disruption of last-minute warnings.
Here’s how to set it up:
- Open Task Scheduler (search “Task Scheduler” in Start Menu)
- Right-click “Task Scheduler Library” and select “Create Basic Task”
- Give it a name like “Daily Disk Space Check”
- Set the trigger: “Daily” at 8:00 AM (or your preferred time)
- Set the action to “Start a Program”
- In the Program field, enter: powershell.exe
- In the Arguments field, paste: -Command “Get-PSDrive -PSProvider FileSystem | Where-Object {$_.Free -lt 5GB} | Export-Csv -Path ‘C:LogsDiskAlert.csv’ -NoTypeInformation”
- Finish and accept the default settings
This script checks every drive and exports only those with less than 5GB free space to a CSV file at C:LogsDiskAlert.csv. Adjust the 5GB threshold to match your requirements—increase it for servers, lower it for client machines with smaller drives.
Once the task runs, you can:
- Review the CSV file manually each morning before starting work
- Configure email alerts by adding a notification script to the task
- Send results to your ticketing system for automatic tracking and escalation
- Export the data into a spreadsheet for trend analysis over time
For IT support staff managing multiple machines across your network, you can push disk space checks using Group Policy or a centralised monitoring tool. This ensures consistency across all machines and provides early warning before users encounter “disk full” errors that disrupt productivity and cause data loss. Proactive monitoring saves hours of emergency troubleshooting.
Identify Which Folders Are Consuming Disk Space
Knowing your C: drive is full is frustrating, but only half the battle — the real question is which folders are consuming the most space. Rather than slowly browsing File Explorer (which runs sluggishly on nearly-full drives), PowerShell can instantly calculate the size of your key system partitions and highlight exactly where the problem lies.
Use this command to see the size of your main Windows folders:
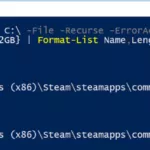
$folders = "C:Windows", "C:Program Files", "C:Program Files (x86)", "C:Users"
foreach ($folder in $folders) {
    $size = (Get-ChildItem $folder -Recurse -ErrorAction SilentlyContinue | Measure-Object -Property Length -Sum).Sum / 1GB
    Write-Host "$folder : $([math]::Round($size, 2)) GB"
}
This command recurses through each folder and reports the total size in gigabytes, providing an instant overview of which area is the problem:
- C:Windows — System files and updates. Anything over 20–25GB may indicate old Windows Updates that haven’t cleaned up properly. Use Disk Cleanup (search cleanmgr in Windows) to remove old Windows installation files and temporary update caches.
- C:Program Files — 64-bit applications. Large professional software, games, or video editing tools commonly exceed 5–10GB each. Uninstall unused applications here first.
- C:Program Files (x86) — 32-bit applications. Usually smaller than Program Files, but worth checking if you see unexpectedly high usage on older machines with legacy software.
- C:Users — Your personal files, Downloads folder, Desktop, Documents, and Recycle Bin. This is often the largest folder and where you’ll find the quickest cleanup wins. Downloads frequently contains forgotten installer files or backup archives you’ve downloaded.
Once you’ve identified the problem folder, the next step is finding the exact large files within it. Use the related post Find the Biggest Files on Your PC Using PowerShell to drill deeper. For example, if C:Users is the culprit, check your Downloads folder first — it often contains old installer files, game installers, or forgotten backup archives you can safely delete. Between these two PowerShell commands, you’ll have complete visibility into exactly what’s consuming your disk space and can make informed cleanup decisions before storage becomes critically low and affects system performance.