What this does
This PowerShell command lets you identify a running application and close a stuck application when it becomes unresponsive. It avoids a full reboot and is faster than opening Task Manager.
When you’d use this
- An application has frozen
- “Not responding” appears and will not close
- Task Manager is slow or unavailable
- You want to close a specific app quickly
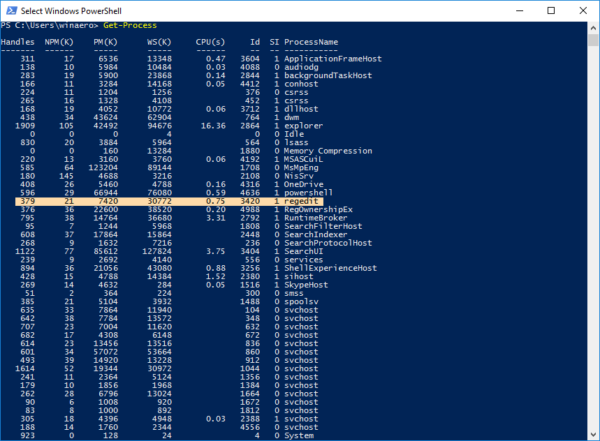
Step 1: Find the running process
Get-Process
This lists all running applications and background processes.
Step 2: Find a specific application
Get-Process chrome
Replace chrome with the name of the application you want to find.
Step 3: Close the stuck application
Stop-Process -Name chrome
This immediately closes the application.
What the output means
- If the command runs without errors, the process has been stopped
- If you see an access error, administrator permissions may be required
Common mistakes to avoid
- Stopping system processes you do not recognise
- Forgetting to save work before closing an application
- Using the wrong process name (check spelling carefully)
Efficiency tip (force close if needed)
Stop-Process -Name chrome -Force
Only use -Force if the application will not close normally.
Why this improves efficiency
- Faster than restarting the PC
- More precise than Task Manager
- Ideal for remote support scenarios
- Reduces unnecessary downtime
Related PowerShell efficiency posts
- PowerShell Efficiency: The Fast Way to Manage Windows
- Check when a Windows PC was last restarted
- Check disk space in seconds using PowerShell
Related Posts
- PowerShell – The Fast Way to Manage Windows
- Check Running Services Quickly Using PowerShell
- Check When a Windows PC Was Last Restarted
- Check Disk Space in Seconds Using PowerShell
- Find the Biggest Files on Your PC Using PowerShell
- Pull Recent System Errors Using PowerShell
Automatically find and close unresponsive processes
If you do not know which application is frozen, PowerShell can identify unresponsive processes for you. This is faster than scanning Task Manager visually and more reliable than guessing.
Find all frozen processes with this command:
Get-Process | Where-Object {$_.Responding -eq $false}
This lists every process that is not responding, showing the process name, process ID (PID), and memory usage. Review the results to identify the frozen application you need to close.
Once identified, close it immediately:
Stop-Process -Name chrome -Force
Use the process ID for precision. If multiple instances of the same application are running, closing by name might terminate the wrong process. Use the ID instead:
Stop-Process -Id 5234 -Force
Replace 5234 with the actual PID from your results. This guarantees you close only the process you intend to.
You can also filter by system resource usage to find problem processes without manually checking each one:
Get-Process | Where-Object {$_.CPU -gt 50}
This shows all processes consuming more than 50% CPU. High CPU usage often indicates a frozen or stuck application hogging resources.
Similarly, find processes using excessive memory:
Get-Process | Where-Object {$_.WorkingSet -gt 1GB}
This lists processes using over 1 GB of RAM—common culprits when your PC slows dramatically.
Combining these techniques means you can identify and close problematic processes in seconds without opening Task Manager at all. This is especially valuable in remote support scenarios, where you need to diagnose and fix issues on another user’s PC quickly, or when Task Manager itself is frozen and unusable.
Finding Resource Hogs: Advanced Filtering
If you know a PC is slow but don’t know which application is causing it, PowerShell can filter processes by resource usage. This helps you identify the real culprit when multiple applications are running simultaneously.
Find processes using high CPU:
Get-Process | Where-Object {$_.CPU -gt 50} | Select-Object Name, CPU, Memory
This lists all processes using more than 50 seconds of CPU time. Adjust the number higher or lower depending on what you consider excessive for your system.
Find processes using high memory:
Get-Process | Where-Object {$_.WorkingSet -gt 500MB} | Select-Object Name, WorkingSet, CPU | Sort-Object WorkingSet -Descending
This shows processes consuming more than 500 MB of RAM, sorted from highest to lowest. Change the threshold to match your system’s specifications and available memory.
Find the worst offenders (high CPU and memory):
Get-Process | Where-Object {($_.CPU -gt 30) -and ($_.WorkingSet -gt 300MB)} | Select-Object Name, CPU, WorkingSet | Sort-Object WorkingSet -Descending
This identifies processes that are both CPU-intensive and memory-intensive simultaneously—usually the real problems affecting system performance.
Export process data for troubleshooting:
Get-Process | Select-Object Name, CPU, WorkingSet, Id | Export-Csv -Path 'C:Logsprocess_snapshot.csv' -NoTypeInformation
Saving snapshots to CSV files is useful for documentation and comparison. Run this command at different times during a slowdown, then compare the files side-by-side to spot which process is behaving abnormally.
Useful approach: Take a snapshot when performance is normal, then another when the system slows down. Compare the two to see which process changed the most. A process jumping from 5% CPU to 90% CPU is your culprit.