What this does
View IP and DNS Information Quickly Using PowerShell, This PowerShell command shows your computer’s IP address, network adapter, gateway, and DNS settings in one place. It is the quickest way to confirm whether a device is correctly connected to the network.
When you’d use this
- Internet access is not working
- A PC is connected but cannot reach websites
- You need to confirm DNS or gateway settings
- During first-line network troubleshooting
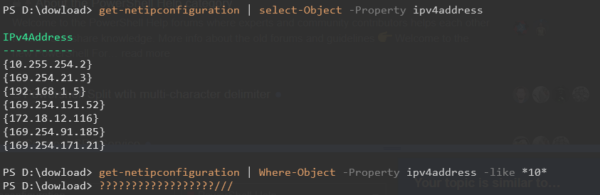
PowerShell command (copy and paste)
Get-NetIPConfiguration
What the output means
- InterfaceAlias – the network adapter in use (Ethernet or Wi-Fi)
- IPv4Address – the device’s IP address
- IPv4DefaultGateway – the router or gateway
- DNSServer – the DNS servers being used
This confirms whether the PC is correctly configured on the network.
Common mistakes to avoid
- Checking the wrong adapter (for example, a disabled Wi-Fi adapter)
- Assuming a valid IP address means DNS is working
- Ignoring VPN adapters, which can change routing
Efficiency tip (show only active adapters)
Get-NetIPConfiguration |
Where-Object {$_.IPv4Address -ne $null}
This removes unused or disconnected adapters from the output.
Why this improves efficiency
- Faster than clicking through Network Settings
- Shows all critical network details in one command
- Ideal for remote troubleshooting
- Reduces guesswork during connectivity issues
Related PowerShell efficiency posts
- PowerShell Efficiency: The Fast Way to Manage Windows
- Check when a Windows PC was last restarted
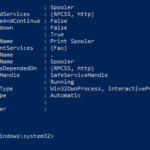
- Check running services quickly using PowerShell
Related Posts
- PowerShell – The Fast Way to Manage Windows
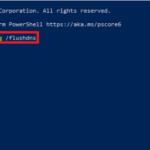
- Flush DNS Cache Safely Using PowerShell
- Test if a Network Port Is Open Using PowerShell
- Check When a Windows PC Was Last Restarted
- Check Running Services Quickly Using PowerShell
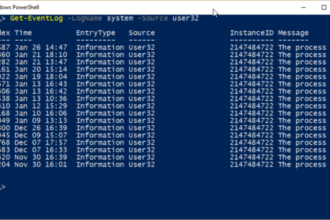
- Pull Recent System Errors Using PowerShell
Testing DNS Resolution Works
Viewing your DNS servers in Get-NetIPConfiguration is only the starting point of thorough troubleshooting. A Windows machine can display perfectly valid DNS server IP addresses yet still fail to resolve domain names and reach websites. This is why the next critical step is to actively test whether DNS resolution is functioning correctly.
After running Get-NetIPConfiguration and noting your configured DNS servers, use Resolve-DnsName to test actual DNS resolution:
Resolve-DnsName google.com
If DNS is working correctly, this command returns the IP address(es) for google.com within seconds. If it fails, times out, or returns an error, your DNS server isn’t responding to queries—even if the configuration appeared correct in the previous step.
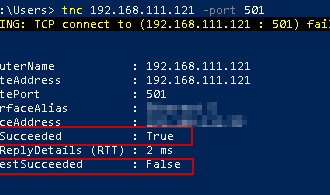
To test connectivity to a specific DNS server, use Test-NetConnection to verify the server is reachable:
Test-NetConnection 8.8.8.8 -Port 53
This checks whether a DNS server can be reached on port 53 (the standard DNS port). The output displays TcpTestSucceeded as True or False, telling you immediately whether that server is accessible from the machine.
Why This Testing Step Matters in Real Troubleshooting
- A configured DNS server doesn’t guarantee it’s responding to queries
- Corporate firewalls and proxies commonly block port 53 to external DNS providers
- ISP DNS servers fail periodically without sending any notification
- Cached DNS entries can persist even after a device reconnects to the network
- VPN software can redirect DNS queries without obvious visual feedback
- Some network appliances rate-limit DNS to prevent abuse
In practice, many support technicians stop their troubleshooting after viewing Get-NetIPConfiguration, assuming correct configuration means DNS is working. This assumption leads to hours wasted when the real issue is a non-responsive DNS server, firewall rules blocking port 53, or a proxy interfering with queries.
Your complete network diagnostics workflow should be: first, run Get-NetIPConfiguration to see what’s configured. Second, immediately follow with Resolve-DnsName to confirm active DNS resolution is working. This two-step approach efficiently separates configuration problems from connectivity problems—something every IT technician should practise during first-line support.