How to Set Up Plex on a Synology NAS: Complete Guide (2026)
Running Plex Media Server on a Synology NAS is one of the best ways to build a personal streaming platform that works around the clock without leaving a desktop PC powered on. Your NAS is already running 24/7, consumes a fraction of the power of a full computer, and sits quietly in a cupboard or rack. Add Plex to that and you have a private Netflix-style service accessible from any device in your home — and anywhere in the world if you set up remote access.
This guide walks through every step: choosing the right Synology model, preparing your media library, installing and configuring Plex Media Server, enabling hardware transcoding, and troubleshooting the most common problems. Whether you are setting this up for the first time or migrating from an older installation, everything you need is here.
Why Run Plex on a Synology NAS?
The appeal is straightforward. A Synology NAS is a device you already leave powered on for backups and file sharing. It draws somewhere between 15 and 30 watts under load — compared to a gaming PC that might draw 200W or more just idling. Running Plex on top adds minimal overhead when you are only browsing a library or streaming a single 1080p stream.
Beyond power consumption, a NAS gives you centralised storage. All your media lives in one place, accessible from Plex on any TV, phone, tablet, or browser. Synology’s RAID support means your library is protected against a single drive failure. And unlike cloud-based services, you own the content and control the data.
Which Synology Models Support Hardware Transcoding?
This is the most important question to answer before you start, because it determines what kind of streaming performance you can expect.
Plex can stream media in two ways: direct play and transcoding. Direct play sends the file as-is to the client, which decodes it locally. This uses almost no CPU on the NAS and works brilliantly when your client supports the file format. Transcoding re-encodes the video in real time — necessary when the client device cannot handle the original codec, when the bitrate needs to be reduced for a slow connection, or when subtitles need to be burned in.
Software transcoding is handled entirely by the CPU. On most Synology models, this is slow and limited — typically one or two simultaneous 1080p streams at best, with 4K software transcoding being effectively impossible on any NAS hardware. Hardware transcoding uses the Intel Quick Sync engine built into certain Intel CPUs to offload the work to dedicated hardware, making it far faster and more efficient.
Synology models that support hardware transcoding use Intel Celeron J4125 or J6412 processors. Well-known examples include:
- DS224+ — Intel Celeron J4125, 2-bay, released 2023
- DS423+ — Intel Celeron J4125, 4-bay
- DS723+ — AMD Ryzen R1600 (note: AMD, different situation — see below)
- DS923+ — AMD Ryzen R1600
- DS1522+ — AMD Ryzen V1500B
Models with ARM processors — such as the DS223j (Realtek RTD1619B) or the DS223 (Realtek RTD1619B) — do not support hardware transcoding in Plex. These are capable NAS devices for file storage and basic streaming (direct play), but if 4K transcoding or multiple simultaneous streams are a priority, they are not the right choice for a Plex server.
The AMD Ryzen models in the DS723+/DS923+/DS1522+ range do have hardware video capabilities, but Plex’s Quick Sync implementation is specifically designed around Intel. As of early 2026, hardware transcoding results on AMD-based Synology units in Plex are inconsistent. Jellyfin (covered at the end of this guide) handles AMD hardware acceleration better.
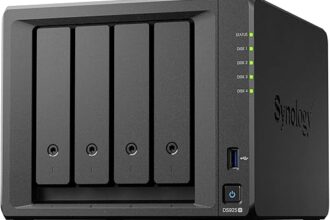
For most home users, the DS224+ is the sweet spot: affordable two-bay unit with a capable Intel CPU that handles hardware transcoding well, backed by Plex Pass.
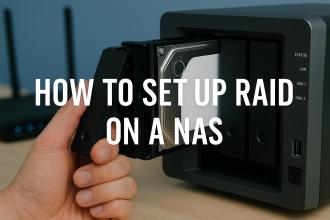
Before You Start: Prepare Your Media Storage
Before installing Plex, spend a few minutes organising your storage properly. Plex’s metadata and library scanning work best when your folder structure follows a consistent pattern.
Create a Dedicated Shared Folder
In Synology’s Control Panel, go to Shared Folder and create a new shared folder called media (or whatever name you prefer). Enable the shared folder and note which volume it is on.
Inside this shared folder, create subdirectories for each type of content:
\
/media\
  /Movies\
  /TV Shows\
  /Music\
  /Photos (optional)\
Plex’s naming conventions matter for accurate metadata matching. For movies, name the folder and file with the title and year: The Dark Knight (2008).mkv. For TV shows, use the series name as the folder with season subfolders:
\
/TV Shows\
  /Breaking Bad\
    /Season 01\
      /Breaking Bad - S01E01 - Pilot.mkv\
      /Breaking Bad - S01E02 - Cat's in the Bag.mkv\
Getting naming right now saves significant frustration later. Plex can match files with inconsistent naming, but clean structure dramatically reduces errors and missing artwork.
Set Permissions
The Plex Media Server package runs under a system user. In most cases Plex handles its own permissions, but if you run into library scanning problems later, check that the PlexMediaServer user (added automatically during installation) has read access to your media shared folder. You can verify this in Control Panel > Shared Folder > Edit > Permissions.
Step-by-Step: Installing Plex Media Server
Method 1: Package Center (Recommended)
- Open DSM in your browser and log in as an administrator.
- Open Package Center from the main menu.
- In the search bar, type Plex Media Server.
- Click Install. DSM will download and install the package automatically.
- Once installed, Plex Media Server will appear in the main DSM menu. Click Open to launch the Plex Web interface.
If Plex does not appear in Package Center, it may not be listed in Synology’s default package sources on your region or DSM version. In that case, use the manual method below.
Method 2: Manual .spk Installation
- Go to plex.tv/media-server-downloads and select Synology (DSM 7) as the platform.
- Choose the correct architecture for your NAS. For Intel J4125 models (DS224+, DS423+), select Intel 64-bit. For ARM models, select the appropriate ARM variant — check the Plex download page which lists compatible architectures by NAS model.
- Download the
.spkfile. - In DSM, open Package Center, click the Manual Install button (top right), and upload the
.spkfile. - Follow the prompts to complete installation.
Manual installation also lets you install a newer version of Plex than what Package Center offers, which can be useful if a recent release fixes a specific bug.
Initial Plex Setup: Claiming Your Server
When you open Plex for the first time, it will launch the setup wizard.
- Sign in or create a Plex account. A free Plex account is required to claim the server. This is what links the server to your identity and enables remote access.
- Name your server. Choose something descriptive — you may have multiple Plex servers over time.
- Add a library. Click Add Library, choose a library type (Movies, TV Shows, Music), give it a name, and click Browse for Media Folder. Navigate to your shared folder — for example,
/volume1/media/Movies. - Repeat for TV Shows and Music libraries.
- Click Next and let Plex scan your library. Depending on how many files you have, this can take a few minutes to several hours.
Once complete, your media will appear with artwork, descriptions, and cast information pulled from The Movie Database (TMDb) and TheTVDB.
Enabling Hardware Transcoding
Hardware transcoding requires a Plex Pass subscription. This is a paid add-on (available as monthly, annual, or lifetime) that unlocks hardware acceleration, offline sync, live TV features, and more. Without Plex Pass, Plex falls back to software transcoding regardless of your hardware.
Activate Plex Pass
Purchase or manage your Plex Pass at plex.tv/plex-pass. Once active, it is linked to your Plex account and automatically applies to any server you claim with that account.
Enable Hardware Transcoding in Plex Settings
- In the Plex Web interface, click the wrench icon (Settings) in the top-left menu.
- Go to Settings > Transcoder.
- Scroll down to find Use hardware acceleration when available and toggle it on.
- Click Save Changes.
To verify it is working, start playing a video that requires transcoding (stream it to a device that cannot direct-play the format, or force transcoding by reducing the quality in the player). In Plex’s Dashboard, the active stream should show (hw) next to the transcoding indicator, confirming Quick Sync is in use.
With hardware transcoding enabled on a DS224+ or DS423+, you can typically handle two to three simultaneous 4K to 1080p transcode streams without the NAS breaking a sweat. Without it, even one 4K transcode will likely overwhelm the CPU.
Remote Access Setup
One of Plex’s best features is remote access — streaming your library from a phone or hotel TV anywhere in the world. Getting this working properly requires a small amount of network configuration.
Plex Relay vs Direct Connection
By default, if Plex cannot establish a direct connection to your server, it routes traffic through Plex Relay — Plex’s own servers. Relay works without any configuration changes, but it is limited to around 2 Mbps, which is fine for 720p but not reliable for 1080p or 4K. A direct connection bypasses Plex’s servers entirely and uses your full upload bandwidth.
To enable direct connections, you need to forward port 32400 from your router to your NAS.
Port Forwarding 32400
- Log in to your router’s admin interface (typically 192.168.1.1 or 192.168.0.1).
- Find the Port Forwarding section (sometimes labelled Virtual Servers or NAT rules).
- Create a new rule:
- External port: 32400
- Internal IP: the static LAN IP of your Synology NAS
- Internal port: 32400
- Protocol: TCP
- Save the rule.
It is strongly recommended to assign your NAS a static IP address on your local network — either via DHCP reservation on the router or by setting a fixed IP in Synology’s Control Panel > Network. If the NAS IP changes, your port forwarding rule will stop working.
Verify Remote Access in Plex
In Plex Settings, go to Remote Access. If port forwarding is working correctly, the status will show Fully accessible outside your network with a green tick. If it shows a warning, double-check the port rule and confirm no firewall (including DSM’s built-in firewall) is blocking port 32400.
Performance Tips
SSD Cache for Metadata
Plex’s metadata database — thumbnails, artwork, watched status, database files — is stored on your NAS volume by default. On a spinning hard drive array, this can feel sluggish when browsing large libraries. If your NAS supports an M.2 SSD cache (the DS224+ and DS423+ both have M.2 slots), adding an SSD and enabling read-write cache in Storage Manager will noticeably speed up metadata access and library browsing.
Even a modest NVMe SSD (250GB is plenty for most users) makes a meaningful difference for this workload.
Know Your Transcoding Limits
Even with hardware transcoding, your NAS has limits. As a rough guide for Intel J4125 models:
| Stream Type | Estimated simultaneous streams (HW transcode) |
|---|---|
| 4K HEVC to 1080p H.264 | 2–3 |
| 1080p to 720p | 4–6 |
| Direct play (no transcode) | Effectively unlimited (network bound) |
The best performance strategy is to maximise direct play. Ensure your clients and TV apps support H.264/H.265 and the audio formats in your files. The Plex app on a modern Chromecast, Apple TV, or Roku will direct-play most files without any transcoding at all.
Transcode Temporary Folder
Plex writes temporary transcode segments to a folder during active transcoding. By default this is on your main volume (spinning drives). You can redirect this to a RAM disk or an SSD path in Plex Settings > Transcoder > Transcoder temporary directory. Using a RAM disk reduces wear on drives and can improve responsiveness, but bear in mind that if your NAS has limited RAM (the DS224+ ships with 2GB), a large RAM disk will compete with system memory.
Common Problems and Fixes
Hardware Transcoding Not Working
If streams show (CPU) instead of (hw), check the following:
- Confirm Plex Pass is active on the account that claimed this server.
- Confirm Use hardware acceleration when available is enabled in Settings > Transcoder.
- Your NAS model must have a supported Intel CPU. ARM models will never show hardware transcoding in Plex regardless of settings.
- Some codecs (particularly AV1) are not supported by Quick Sync on J4125 — those will fall back to software automatically.
Library Not Scanning or Metadata Missing
If files are not appearing after adding a library, or artwork is missing:
- Check file naming against Plex’s naming conventions. A file named
movie.mkvwill not match correctly — include the title and year. - Go to the library, click the three-dot menu, and choose Scan Library Files then Refresh All Metadata.
- If a specific title is matching the wrong thing, use Fix Incorrect Match on that item to manually select the correct entry.
- Check that the
PlexMediaServersystem user has read permissions on the shared folder containing media.
Remote Access Not Working
If Plex shows “Not available outside your network” or streams are routing via Relay:
- Verify the port 32400 forwarding rule is saved and active on your router.
- Check your NAS has a static local IP — if it changed, the port forward points to the wrong device.
- Check DSM’s built-in firewall: Control Panel > Security > Firewall. If enabled, add a rule to allow incoming TCP on port 32400.
- Some ISPs block inbound connections on non-standard ports, or use Carrier-Grade NAT (CGNAT) which prevents port forwarding entirely. If you are on CGNAT, Plex Relay may be your only option — or consider a VPN tunnel such as Tailscale, which bypasses NAT issues entirely and works well with Plex.
Plex Server Stops After DSM Update
After a major DSM update, packages sometimes stop and need to be manually restarted. Check Package Center > Installed and look at Plex’s status. If it shows as stopped, click Run. If this happens repeatedly, check whether auto-start is enabled in the package settings.
Plex vs Jellyfin on Synology: An Honest Comparison
No guide to running a media server on Synology in 2026 would be complete without mentioning Jellyfin. Jellyfin is a fully open-source, completely free media server — a fork of the original Emby project before it went closed-source. It is a genuine alternative to Plex and worth considering seriously.
Here is an honest side-by-side:
| Feature | Plex | Jellyfin |
|---|---|---|
| Cost | Free for basic; Plex Pass required for hardware transcoding, sync, etc. | Completely free, including all features |
| Hardware transcoding | Plex Pass required (paid) | Free, included out of the box |
| AMD hardware acceleration | Limited/inconsistent | Better support via VAAPI |
| Client app quality | Polished, widely available | Good but more variable across platforms |
| Metadata/library management | Excellent, largely automatic | Good, occasionally needs manual correction |
| Remote access | Easy, with Plex Relay fallback | Requires manual setup (no relay) |
| Privacy | Account required; some telemetry | No account required; fully self-hosted |
The honest verdict: if you have an Intel-based Synology and are happy paying for Plex Pass (either a one-off lifetime purchase or a subscription), Plex is the more polished experience with better client support across TVs, phones, and streaming sticks. If cost is a concern — or if you are running an AMD Synology model and want reliable hardware transcoding — Jellyfin is an excellent free alternative that has matured significantly and is very capable on Synology hardware. You can even run both side by side and see which suits you better.
Summary
Setting up Plex on a Synology NAS gives you a powerful, always-on personal media server with minimal ongoing power consumption. The key decisions come down to choosing a NAS with an Intel CPU if you need hardware transcoding, organising your media library cleanly before you start, and configuring port forwarding for a reliable direct connection when accessing remotely.
With a DS224+ or DS423+ and Plex Pass, you have a system capable of handling 4K HDR content for multiple simultaneous viewers — all from a device that sits quietly on a shelf and draws less power than a light bulb. Once it is running, day-to-day use requires almost no maintenance, and your entire media collection is available on any screen in your home or on the go.