How to Set Up DrayTek VigorAP Access Points: Complete Guide (2026)
DrayTek’s VigorAP range is one of the most capable families of business-grade wireless access points available at a sensible price point. Whether you’re blanketing a multi-floor office in reliable Wi-Fi or eliminating dead spots in a large home, a VigorAP gives you the performance and management flexibility to do the job properly. Unlike consumer mesh systems that hide configuration behind a smartphone app, VigorAPs expose a full web interface and integrate tightly with DrayTek’s Vigor router range — giving network administrators real control over SSIDs, channels, roaming behaviour, and per-client monitoring.
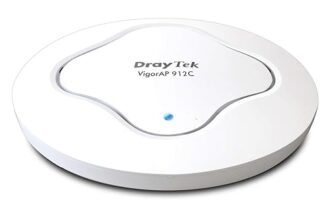
This guide covers everything from unpacking and physically mounting your VigorAP, through to configuring it either as a standalone access point or as part of a centrally managed Wi-Fi estate controlled from your Vigor router’s AP Management dashboard. Models referenced throughout include the VigorAP 905, VigorAP 912C, and VigorAP 960C, though the process is broadly identical across the current VigorAP lineup.
Standalone vs Managed Mode: Understanding the Difference
Before touching a single cable, it’s worth deciding which management approach fits your setup. DrayTek VigorAPs support two distinct modes of operation:
Standalone Mode
In standalone mode, each access point is configured independently through its own web interface. You log in to each AP separately, set the SSID, password, channel, and any other parameters you need, and the AP operates entirely on its own. This approach is perfectly sensible for small deployments — a single AP in a home office, or two APs covering different floors where separate SSIDs aren’t a problem. Standalone mode gives you complete direct control and doesn’t depend on any particular router model.
Managed Mode (AP Management)
If you have a DrayTek Vigor router — such as the Vigor 2865, Vigor 2927, or any current Vigor model with AP Management support — you can bring all your VigorAPs under centralised management. The router discovers APs on the LAN automatically, and you push a consistent SSID configuration to all of them from a single screen. You can monitor client connections, signal levels, and AP health from the router dashboard, and push firmware updates to every AP in one operation. For any deployment beyond two or three APs, managed mode saves significant time and reduces the risk of configuration drift between units.
The key practical point: managed mode does not change how the AP serves wireless clients. It simply moves the administrative control plane from each AP’s individual web UI to the router. The AP still processes all wireless traffic locally — there is no tunnelling or performance overhead.
Physical Installation
Power over Ethernet (PoE)
All current VigorAP models are powered via Power over Ethernet, which means a single Cat5e or Cat6 cable handles both network connectivity and power. This massively simplifies installation — no mains socket required at the ceiling or wall location. You have two options for providing PoE:
- PoE switch: Connect the AP’s ethernet cable directly to a PoE-capable switch port. This is the preferred approach for multi-AP deployments. Check the AP’s PoE standard — the VigorAP 912C and 960C support 802.3at (PoE+), so confirm your switch port supplies the correct wattage (typically 15–30W depending on model).
- PoE injector: If your switch doesn’t support PoE, use a single-port PoE injector between the switch and the AP. The injector plugs into a standard mains socket and has two ethernet ports — one labelled “Data In” (connects to your switch) and one labelled “PoE Out” (connects to the AP).
Cabling Requirements
Use Cat5e as a minimum, Cat6 for any new installations. Keep runs under 100 metres (the 802.3 standard limit for PoE over copper). If you’re running cable in a ceiling void or through conduit, check local building regulations — in commercial premises you’ll typically want CCA-free, screened cable. Label both ends during installation; you’ll thank yourself later when troubleshooting.
Mounting
VigorAPs ship with a ceiling mount bracket and the necessary fixings. The standard installation approach is ceiling-mount in the centre of the area you want to cover — this maximises the radial signal coverage. For wall mounting (in a corridor, for example) the same bracket works on a vertical surface. Run the ethernet cable through the ceiling void or surface trunking to the mount point, thread through the AP bracket, and connect before clipping the AP body into place. Ensure the AP is mounted firmly — a loose AP that occasionally loses its ethernet connection is a frustrating fault to diagnose remotely.
Part 1: Standalone Setup
Step 1: Connect the AP and Find Its IP Address
Connect the VigorAP to your PoE switch or injector. The AP will boot within 60–90 seconds — the LED will cycle through colours before settling on a steady or slow-blinking white/green to indicate it’s operational.
By default, a factory-fresh VigorAP has the IP address 192.168.1.2 on its LAN interface. However, if your network’s DHCP server assigns it an address on first connection, the AP will take that DHCP address instead of its static default. To find the actual IP address assigned:
- Log in to your router’s DHCP lease table and look for a hostname beginning with “VigorAP” or the AP’s MAC address (printed on the label on the back of the unit).
- Alternatively, connect a laptop directly to the AP with a standard ethernet cable (no PoE switch needed — use a PoE injector). Your laptop will receive an address in the 192.168.1.x range, and the AP will be at
192.168.1.2.
Step 2: Log In to the Web Interface
Open a browser and navigate to the AP’s IP address — e.g. http://192.168.1.2. You’ll be presented with the VigorAP login page. The default credentials are:
| Field | Default Value |
|---|---|
| Username | admin |
| Password | admin |
On first login the AP will prompt you to change the admin password. Do this immediately — leaving default credentials on any network device is a significant security risk.
Step 3: Change the Admin Password
Navigate to System Maintenance > Administrator Password. Enter a strong password of at least 12 characters combining upper and lower case letters, numbers, and symbols. Save and re-login with your new credentials.
Step 4: Confirm Operating Mode
VigorAPs can operate in several modes. For standard use as a wireless access point on an existing network, you want AP mode — not Router mode, not Repeater mode. Navigate to Operation Mode in the main menu. Confirm “AP” is selected. If the device was previously configured in a different mode, change it to AP and allow the AP to reboot before continuing.
In AP mode, the VigorAP bridges wireless clients onto the wired LAN segment. It does not perform NAT or run DHCP — that’s handled by your main router. This is the correct and expected behaviour.
Step 5: Configure IP Address (DHCP)
To avoid IP conflicts and ensure the AP gets a proper address on your LAN, set it to obtain its management IP via DHCP. Navigate to LAN > General Setup and set the IP Address Assignment to DHCP Client. Save and apply. The AP will reboot and pick up an address from your router’s DHCP pool.
Once it comes back online, check your router’s DHCP lease table again to confirm the new address, then browse to it. Consider assigning the AP a DHCP reservation (based on its MAC address) so it always receives the same IP — this makes ongoing management much easier.
Step 6: Configure SSID and Wireless Security
Navigate to Wireless LAN (2.4GHz) > General Setup to configure the 2.4GHz radio. Key settings:
- SSID: Enter the network name you want to broadcast. Make it consistent with any other APs on your network — clients roam between APs with the same SSID more reliably.
- Security Mode: Select WPA3/WPA2 Mixed if your client devices support it, or WPA2-PSK for broader compatibility. Avoid WPA or WEP — these are deprecated and trivially broken.
- Passphrase: Use a strong, memorable passphrase. Minimum 12 characters.
- SSID Broadcast: Leave enabled unless you have a specific reason to hide the SSID (hiding it provides minimal security benefit and complicates client connections).
Repeat the same configuration under Wireless LAN (5GHz) > General Setup for the 5GHz radio, using the same SSID and password to allow seamless band steering.
Step 7: Channel Configuration
Channel selection has a significant impact on wireless performance, particularly in environments with neighbouring Wi-Fi networks.
For 2.4GHz, use only non-overlapping channels: 1, 6, or 11. These are the only three non-overlapping channels in the 2.4GHz band (in the UK/EU regulatory domain). If you have multiple APs within range of each other, assign them different channels from this set. Auto channel selection is available and works reasonably well, but fixed channels give more predictable behaviour in dense environments.
For 5GHz, the band is much wider with many non-overlapping channels available (36, 40, 44, 48, 52, 56, 60, 64, and higher DFS channels). Auto channel selection is generally reliable for 5GHz. Avoid DFS channels (100+) if you experience radar-triggered channel changes causing brief disconnections.
Navigate to Wireless LAN > Channel & BSSID to set your preferred channel for each radio.
Part 2: Managed via Vigor Router AP Management
Step 1: Enable AP Management on the Router
Log in to your Vigor router’s web interface (typically at 192.168.1.1). Navigate to Wireless LAN > AP Management. If you don’t see this menu item, check that AP Management is enabled under System Maintenance > Feature Activation — some Vigor models require it to be explicitly switched on.
On the AP Management page, ensure the feature is set to Enable and that the management VLAN or interface is set to the same LAN segment your VigorAPs are connected to. Save the settings.
Step 2: Discover VigorAPs on the LAN
Once AP Management is enabled, the router actively scans the LAN for connected VigorAPs. Navigate to Wireless LAN > AP Management > AP List. Within a minute or two, any VigorAP on the same LAN segment will appear in the list with its IP address, MAC address, model, firmware version, and current status.
If an AP does not appear automatically, you can add it manually by clicking Add and entering the AP’s IP address. This is useful when APs are on a different VLAN or subnet, though note that cross-subnet AP Management may require additional routing configuration.
Step 3: Push SSID Configuration to All APs
This is where centralised management pays dividends. Rather than logging in to each AP individually, you define SSID profiles on the router and push them to all managed APs simultaneously.
Navigate to AP Management > SSID Profile. Create a profile with your SSID name, security mode (WPA2/WPA3), and passphrase. You can create multiple profiles — for example, one for staff and one for guests — and assign them to different SSIDs on each AP.
Once your profiles are defined, go to AP Management > AP List, select all your APs, and click Apply Profile. The router will push the configuration to each AP in turn. APs will briefly restart their wireless radios to apply the new settings — connected clients will reconnect within a few seconds.
Step 4: Monitor AP Status and Connected Clients
The AP Management dashboard provides a live view of your wireless estate. From AP Management > AP List you can see:
- Online/offline status for each AP
- Current channel in use on each radio
- Number of associated clients
- Signal strength and noise floor readings
- AP uptime
Clicking through to an individual AP shows per-client detail — MAC address, IP address, signal strength (RSSI), Tx/Rx rates, and connection time. This is invaluable for diagnosing poor wireless performance: if a client is showing a weak RSSI despite being physically near an AP, it may be stuck roaming to a more distant unit.
Step 5: Firmware Updates via AP Management
Keeping VigorAP firmware current is important for security patches and feature additions. Via AP Management, navigate to AP Management > Firmware Upgrade. The router can check DrayTek’s servers for available firmware updates across all managed APs and deploy them in batch. You can schedule upgrades for off-hours to avoid disrupting users during the working day. Alternatively, download firmware manually from draytek.co.uk and upload via the same interface.
Roaming: 802.11r Fast Roaming and Band Steering
802.11r Fast BSS Transition
In a multi-AP environment, clients moving through a building will roam between access points. Without fast roaming, the standard 802.11 reassociation process involves a full authentication exchange that can take 200–500ms — noticeable as a brief dropout on VoIP calls or video streams. 802.11r (Fast BSS Transition) caches authentication keys between APs, reducing roaming time to under 50ms in typical deployments.
To enable 802.11r on a VigorAP, navigate to Wireless LAN > Advanced Setting and enable Fast BSS Transition (802.11r). If using AP Management, enable it in the SSID profile and push to all APs. Note that 802.11r must be enabled consistently across all APs sharing the same SSID — enabling it on only some APs can cause roaming failures with certain client devices.
A small number of older devices have buggy 802.11r implementations. If you experience clients failing to connect after enabling 802.11r, you can enable 802.11r in FT over DS mode as a fallback, or disable it and rely on standard reassociation.
Band Steering
Band steering encourages dual-band capable clients (which is virtually every device made in the last decade) to connect on 5GHz rather than 2.4GHz. The 5GHz band offers more capacity and less interference in typical environments, though at the cost of somewhat reduced range compared to 2.4GHz.
Enable band steering under Wireless LAN > Band Steering. The VigorAP will initially suppress its 2.4GHz response to probe requests from capable clients, nudging them towards 5GHz. If the client doesn’t connect to 5GHz within a short timeout, the AP falls back to allowing the 2.4GHz connection. The result is that capable devices prefer 5GHz without stranding older 2.4GHz-only devices.
Band steering works best when your 2.4GHz and 5GHz SSIDs share the same name — which is the recommended configuration for this reason.
Troubleshooting
AP Not Discovered by the Router
If your VigorAP doesn’t appear in the router’s AP Management list after a few minutes, check the following:
- Same subnet: The AP must be on the same LAN segment (or a routed segment with proper VLAN tagging) as the router’s LAN interface. A VigorAP on a separate VLAN will not be auto-discovered unless multicast routing or a management VLAN is configured.
- AP mode confirmed: If the AP is in Router mode, it will NAT traffic and appear as a separate network — not a managed device. Reset to AP mode.
- Firewall rules: AP Management uses UDP port 9595 for communication between the router and APs. If you have any inter-VLAN firewall rules, ensure this port is permitted.
- Try manual add: If auto-discovery fails, try adding the AP manually by IP in the AP List. If this works, the issue is with multicast discovery rather than the management protocol itself.
Clients Not Roaming Between APs
Sticky client behaviour — where a device clings to a distant, weak AP instead of roaming to a closer, stronger one — is one of the most common Wi-Fi complaints in multi-AP environments. The decision to roam is made by the client device, not the AP, which limits what can be done from the infrastructure side. However:
- Enable 802.11r to reduce roaming latency when the client does decide to move.
- Enable 802.11k (neighbour reports) and 802.11v (BSS Transition Management) if available on your VigorAP model — these allow the AP to actively suggest better APs to clients.
- Reduce transmit power on each AP so that signal drops off more steeply, forcing clients to roam sooner. Navigate to Wireless LAN > Advanced Setting > Tx Power and reduce from 100% to 50–75% in dense installations.
- Enable Minimum RSSI (sometimes called aggressive roaming or client kick): the AP disconnects clients whose signal drops below a defined threshold, forcing them to reassociate — hopefully to a closer AP. Set this under Wireless LAN > Advanced Setting.
Double-NAT Issues
If clients connected to the VigorAP can’t reach other devices on the LAN, or appear to have an unexpected IP range (e.g. 192.168.2.x when your main network is 192.168.1.x), the AP is likely in Router mode rather than AP mode. In Router mode the VigorAP runs its own DHCP server and performs NAT — creating a separate network behind the AP. Correct this by navigating to Operation Mode and switching to AP. After rebooting, connected clients will receive addresses from the main router’s DHCP pool and sit on the same flat LAN as all other devices.
SSID Not Broadcasting
If the VigorAP is online and reachable by IP but not broadcasting its SSID:
- Check that the SSID is enabled in Wireless LAN > General Setup and that the radio is active (not disabled).
- Verify the correct regulatory domain is set under Wireless LAN > Advanced Setting > Country Code. An incorrect country code can disable certain channels or entire bands.
- If managed by AP Management, confirm the SSID profile was successfully pushed — check the AP’s individual status in the AP List for any configuration errors.
- Try a factory reset (hold the reset pin for 10 seconds while powered) and reconfigure from scratch if the above checks don’t reveal the issue.
Summary
DrayTek VigorAPs are a mature, well-specified platform that reward a methodical setup approach. For single-AP installations, the standalone web UI gives you everything you need in a few straightforward steps. For multi-AP deployments, investing the time to configure AP Management on your Vigor router pays back immediately in simplified ongoing administration — consistent SSIDs, centralised monitoring, and batch firmware updates make managing a growing wireless estate genuinely manageable rather than a per-device chore.
The roaming features — 802.11r, band steering, and minimum RSSI thresholds — are the difference between a Wi-Fi installation that technically works and one that feels seamless to users. Take the time to configure and test roaming behaviour with the devices your users actually carry, and you’ll have a wireless network that reliably delivers on the hardware’s potential.